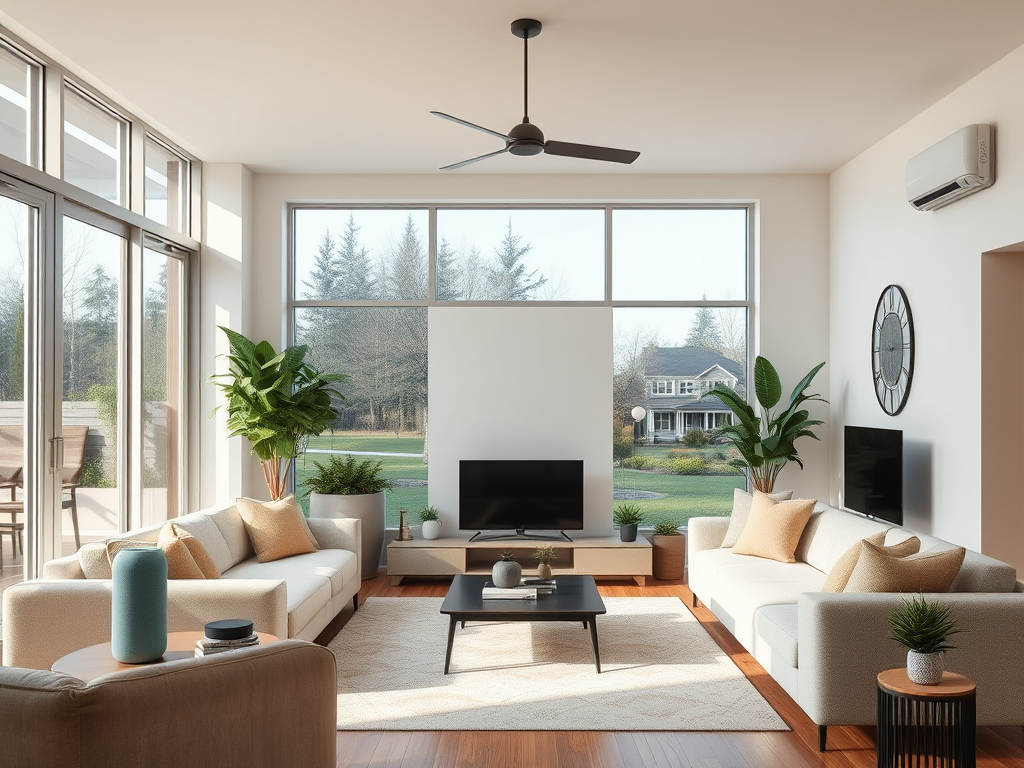
Finding the right smart home setup can feel overwhelming when so many options fill the market. For the average American homeowner and their peers worldwide, energy costs and security concerns drive a growing interest in automation. Studies show almost half of urban homeowners now consider smart tech essential for peace of mind and lower bills. This guide helps you pinpoint the best beginner-friendly solutions to make your home safer and more efficient with confidence.
Table of Contents
- Step 1: Assess Your Home’s Automation Needs
- Step 2: Select Compatible Smart Devices And Platforms
- Step 3: Install Devices And Connect To Your Network
- Step 4: Integrate Automation Using A Central Hub Or App
- Step 5: Test And Optimize Your Smart Home System
Quick Summary
| Key Insight | Explanation |
|---|---|
| 1. Assess Automation Needs First | Identify your goals and lifestyle needs to choose effective smart home technologies. |
| 2. Select Compatible Devices and Platforms | Ensure devices communicate well by choosing those with compatible protocols, like Wi-Fi or Zigbee. |
| 3. Optimize Device Placement | Position devices strategically for optimal signal strength and performance within the home. |
| 4. Use a Central Hub for Integration | Integrate all devices through a central hub or app for streamlined automation and management. |
| 5. Continuously Test and Optimize | Regularly verify device performance and adjust automation settings based on real-world usage. |
Step 1: Assess your home’s automation needs
Assessing your smart home automation requirements is the critical first phase of creating a connected living space. This process helps you understand which technologies will genuinely improve your daily life and provide meaningful benefits.
Start by walking through each room and considering your primary goals. Are you looking to enhance security, reduce energy consumption, improve convenience, or create a more comfortable living environment? Smart home components can transform your living space by addressing specific needs like automatic lighting, temperature control, security monitoring, or entertainment system integration.
Consider your lifestyle and daily routines. Do you work long hours and want automated systems that manage energy efficiency? Are you interested in voice-controlled devices that simplify household tasks? Do you have family members with mobility challenges who could benefit from smart home technologies? Each household has unique requirements, so a personalized approach matters most.
The table below summarizes common automation goals and suggested device types:
| Goal | Recommended Device Type | Typical Area in Home |
|---|---|---|
| Security | Smart cameras, sensors | Doors, entryways |
| Energy efficiency | Smart thermostats, plugs | Living areas, bedrooms |
| Convenience | Voice assistants, switches | Kitchen, living room |
| Comfort | Smart lighting, blinds | Bedrooms, lounge spaces |

Pro tip: Create a spreadsheet listing each room, desired automation goals, and potential smart home solutions to visualize your comprehensive strategy.
Step 2: Select compatible smart devices and platforms
Choosing the right smart home devices and platforms is crucial for creating a seamless and efficient automated home environment. Your goal is to select technologies that communicate effectively and integrate smoothly with each other.
Start by understanding the core communication protocols that enable device connectivity. Smart home devices typically use networks like Wi-Fi, Zigbee, and Z-Wave to communicate, so compatibility becomes your primary consideration. Consider a central smart home hub that can act as a bridge between different device types and communication standards. Popular platforms like Amazon Alexa, Google Assistant, and Apple HomeKit offer extensive device ecosystems that can simplify your integration process.
Here is a quick reference comparing popular smart home communication protocols:
| Protocol | Range | Primary Use Cases |
|---|---|---|
| Wi-Fi | Up to 150 feet indoor | Cameras, streaming devices, hubs |
| Zigbee | 30-60 feet indoor | Lighting, sensors, small devices |
| Z-Wave | 100 feet indoor | Security, locks, alarms |
| Bluetooth | 30 feet indoor | Door locks, presence sensors |
When selecting devices, prioritize those that support multiple communication protocols and offer broad platform compatibility. Look for devices with clear integration specifications and check their compatibility with your preferred smart home assistant. Verify that the devices you choose can work together seamlessly and provide the specific automation features you want for each area of your home.
Pro tip: Create a compatibility matrix documenting each device’s communication protocol, supported platforms, and specific integration capabilities before making any purchases.
Step 3: Install devices and connect to your network
In this crucial stage, you will physically install your smart home devices and establish their network connections to create a unified automation system. This process transforms your existing home infrastructure into an intelligent interconnected environment.
Configuring wireless communication protocols requires strategic sensor placement and precise network integration. Begin by carefully positioning each device in its optimal location. Smart home sensors and actuators need strategic placement near power outlets and within reliable wireless signal range. Download the corresponding mobile app for each device and follow the manufacturer’s specific setup instructions. Most devices will require you to create an account, connect to your home Wi-Fi network, and complete a registration process through their dedicated smartphone application.

Ensure each device is powered correctly and within communication range of your central smart home hub or primary network router. Check signal strength and test device responsiveness before finalizing your installation. Verify that all devices can communicate seamlessly and respond to commands from your chosen smart home platform or voice assistant.
Pro tip: Create a physical map of your home marking exact device locations and network connection points to troubleshoot potential signal interference or connectivity issues.
Step 4: Integrate automation using a central hub or app
Creating a cohesive smart home ecosystem requires thoughtful integration of your devices through a central control platform. This step transforms individual smart devices into a unified, responsive home automation system.
Smart home automation integration uses a centralized hub or app to send commands across different network protocols, enabling seamless communication between your devices. Choose a hub or app that supports multiple device types and communication standards. Popular platforms like Home Assistant offer comprehensive integration capabilities that allow you to create complex automation rules and schedules. Look for platforms that support voice control through Amazon Alexa or Google Assistant, providing hands-free management of your smart home environment.
Take time to explore your chosen platform’s automation capabilities. Set up routines that connect multiple devices and create intelligent responses to specific triggers. For example, you might configure a morning routine that gradually raises smart lighting, adjusts your thermostat, and starts your coffee maker simultaneously. Test each automation carefully to ensure reliable performance and make incremental adjustments as you become more comfortable with the system.
Pro tip: Begin with simple automation sequences and gradually build complexity to avoid overwhelming your system and ensure smooth integration.
Step 5: Test and optimize your smart home system
The final stage of your smart home automation journey involves carefully testing and fine tuning your newly installed system to ensure seamless performance and reliability. This critical step transforms your initial setup into a truly responsive and intelligent home environment.
Testing a smart home system requires systematic verification of communication stability and automation rule execution. Start by methodically checking each device and automation routine. Trigger your preset scenarios manually and observe how devices interact. Verify voice commands work consistently, check response times, and confirm that complex multi device automations perform exactly as you intended. Pay close attention to potential communication delays or unexpected behaviors that might disrupt your desired smart home experience.
Optimization is an ongoing process that involves continuous refinement. Update firmware across all devices regularly, adjust device placement to improve network signal strength, and refine automation rules based on your actual usage patterns. Consider creating backup configurations and documenting your setup to make future troubleshooting easier. Listen to feedback from family members and be prepared to make incremental adjustments that enhance the system’s overall usability and effectiveness.
Pro tip: Create a digital log tracking device performance, firmware versions, and automation rule changes to maintain a comprehensive record of your smart home system’s evolution.
Unlock Your Smart Home Potential with Expert Guidance
Setting up a smart home can feel overwhelming when you face challenges like selecting compatible devices, integrating diverse platforms, and optimizing automation for your unique lifestyle. This tutorial highlights key pain points such as choosing communication protocols like Zigbee or Z-Wave, strategically installing devices, and ensuring seamless network connectivity. If you want to avoid costly mistakes and unlock the full benefits of convenience, security, and energy savings, professional insights can make all the difference.
Discover how Smart Home HQ can guide you through each crucial step with unbiased reviews, real-world testing, and easy-to-follow setup instructions tailored to beginners and tech enthusiasts alike.

Take control of your connected home journey right now. Explore our comprehensive resources and make confident choices with expert tips on compatible devices, integration strategies, and troubleshooting solutions at Smart Home HQ. Start transforming your living space into the smart home you deserve today.
Frequently Asked Questions
How do I assess my home’s automation needs?
Start by walking through each room and identifying your primary goals, like enhancing security or improving energy efficiency. Create a list of desired functionalities for each space to visualize your automation strategy.
What smart home devices should I choose for my setup?
Select devices that are compatible with different communication protocols like Wi-Fi, Zigbee, or Z-Wave. Prioritize those that communicate well with your central hub and meet your specific automation goals, such as smart lights or security cameras.
How do I install and connect my smart home devices?
Physically install your devices in optimal locations, ensuring they are within range of your central hub. Follow the manufacturer’s setup instructions to connect each device to your home Wi-Fi and register it using the corresponding app.
How can I integrate my smart home devices into one system?
Use a central hub or app that supports multiple device types to manage your smart home automation. Set up automation routines by linking devices together, like configuring a schedule that turns on lights and adjusts the thermostat simultaneously.
What steps should I follow to test my smart home system?
Systematically check each device and automation routine to verify functionality. Manually trigger scenarios and observe interactions to ensure everything works as intended, adjusting settings to optimize performance if necessary.
How do I optimize my smart home system over time?
Maintain regular updates for each device’s firmware and refine your automation rules based on actual usage. Keep track of device performance and configurations in a digital log to facilitate future troubleshooting and improvements.
Recommended
- How to Make a Smart Home: A Complete Guide – Smart Home HQ